Thursday, September 29, 2011

Project Update: Majestic Hardware by Bar Mills

No new progress since introduction few days ago. I haven't posted any pictures yet so here they are.


Project Update: Saw Pit Store by JL Innovative Design

I have decided to make the store all white. Quite a number of signs will be added. I think they will add color and they will look beter in white background. I painted all walls and stripwood last night.

Project Update: Wicked Wanda's by Bar Mills

I had trouble with my home made static grass applicator again. It was power switch. Just like previous time. Good thing the switch still had a pair of working contacts so I just moved the wires. After I fixed it I applied some static grass over diorama and made few tufts using Jimmy Simmons' from Monster Modelworks method. I think they have turned out OK for the first attempt. I need to play more with different length and color grass material.


My tuft farm.


Closeup.

Project Update: Finescale Miniatures JS-13 Elijah Roth & Sons

It looks like "water" has leveled itself a bit. It is hard to see in the picture but peaks aren't as steep as they were right after I applied gloss medium.


Anyway, all this effort is pretty much for nothing. Water will be covered by a platform.


I did some work on the water wheel over few past days. It still needs paddles and weathering.


The mill will be in following state for some time. I don't expect to work on it until I have all lighting figured out. If I have time I may do some sub-assemblies or move on to the next structure.


Project Update: Fat Jimmy's BBQ

I don't anything to add to my previous project update regarding Fat Jimmy's. Only pictures.


Tuesday, September 27, 2011

Project Update: Sokol's Mattress & Furniture Co by Bar Mills

I am getting closer to putting together the walls. It doesn't seem like I have made a lot of progress since last update but window mullions in this kit are real pain. Fit ws very tight when window frames and mullions weren't painted. After painting I had to go and scrape some of the paint. I only could do about 6 windows per hour. Then I installed window gazing using Model Master Flat Clear Acryl. I will dust them with some chalks later to make them look dirty instead of frosted. Shades look kind of bright right now but they will tone down a bit after I dirty up the glazing. Four windows don't have shades. These are office windows. I will install shades there. Windows without mullions will be open.
Having gray background for kind of gray walls isn't the best idea but that is only I have.

Monday, September 26, 2011

Project Update

I don't have any pictures to post so instead of doing separate post for each project I am putting all projects in one. Hopefully, I will be able to take some photos tonight.

Wanda's.
Progress is somewhat slow. It is kind of do one thing and set aside for a day to dry at this point. Over the period of past almost two weeks I made new base, "dug up" the tree from previous base and "planted" it in the new one, weathered, installed, and ballasted track, made new road and covered all surface with Sculptamold. I wanted to apply dirt over Sculptamold last night but the road was still wet so I didn't take any chances. In addition to all mentioned, I have made power pole, prepared a transformer and a cross arm. I have yet to figure out how to run power lines into the building. I can walk outside and look around but I am afraid it may be too contemporary.

Elijah Roth.
With Wanda's being slow I have made quite good progress making EJ. For the base, I painted and installed water chute, made wood platform that goes over some kind of  water reservoir that is next to the chute, painted the water wheel. I didn't have Floquil Roof Brown as suggested in the instructions so I mixed Rust with Rail Brown for the water wheel. After applying first coat I decided that it didn't look like rust at all so for the second coat I used just Rust. Now it all looks like covered in fresh rust. With help of A&I and weathering powders I think I can make rust look older. For water in the reservoir I used Liquitex heavy clear gel which is too heavy for this purpose. My ripples turned out to be to high but it was only gel I had. I wonder if I could have thinned it a bit. Well, it doesn't matter much since it will all be covered pretty much anyway.
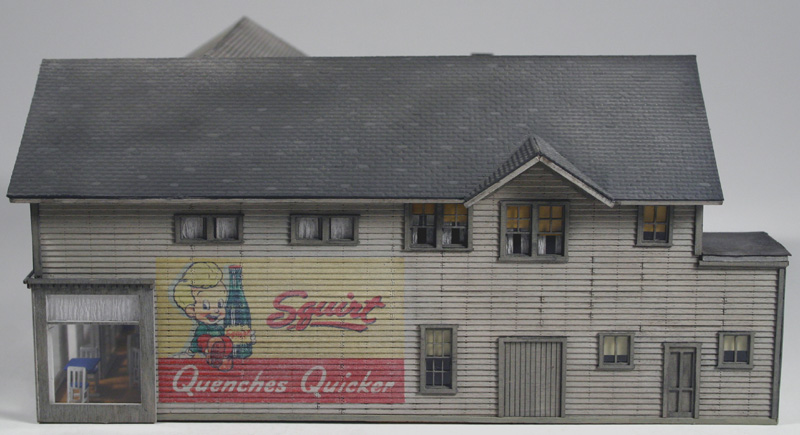
I have put mill walls together as well. Before that I painted inside black where lighting will be installed so it doesn't shine through. I also tried new way of gluing in window  glazing I think it worked quite well. Some time ago Dave Frary suggested dipping glazing in Future floorwax to get more glass like appearance. Acrylic in the Future acts as bonding agent as well what is quite time saver too. I wanted dirty windows for this project. Therefore I used Modelmaster matte acrylic instead of Future. After acrylic dried I dusted windows with chalks to get dirty looking windows.
Since I have mentioned lighting I am going expand a little bit on the subject. My idea is to have welding light coming out from inside of the mill. It wouldn't be difficult to achieve since there are commercially available boards that do just that. However, I want as well outside and inside light dim and flicker in sync with welding light. Being embedded programmer I have always wanted to make some gadget outside of my work scope. I think this is perfect opportunity. So far I have figured out that I need 4 or 5 LEDs - one outside warm (yellowish) very small, one blue and one cool white for the welding light, two warm white for the inside. I am not sure about blue light. This is something I saw at NNGC Hickory few weeks ago at Microlumina table. Welding light starts with blue and turns to white as it continues. I will play around to see if it is something I really like. I plan on using ATtiny micro controllers from Atmel. I am not sure if ATtiny4 has enough program memory for everything. Next step up is ATtiny9 which has twice as much. I still need to figure out few other things before placing an order for the parts and programmer for the micro controller.

Fat Jimmy's.
I installed front porch roof. I used shingles painted in various brown colors suggesting it being somewhat new. I am not sure if I like it. Something is bugging me about that. I think I'll just go over with shoe dye solution to add some gray silver tint.

Majestic Hardware by Bar Mills.
This is new old player. New because I haven't introduced it on this blog. Old because it is almost finished. It really needs one weeknight which I have problem dedicating it to Majestic exclusively. My intention is to do one or two small steps every night but I get caught up in other things. Finally, past weekend I shingled up three overhangs that will go over the doors. Originally there was only one but I am not sticking completely to the instructions. Other changes include a shed and extended platform.

Saw Pit Store by JL Innovative Design.
And this one is completely new player. I have been commissioned to do it. I had a choice of several other kits but I picked this because I wanted something quick this time. The kit came in the mail past Friday. To my surprise it was an older edition. The walls were all precut with circular saw I think. However, windows and doors were just marked and needed to be cut out. Some sanding of the edges was needed as well since there was a lot of fuzz. After all this I stained all wood with Sherwin-Williams driftwood stain replacement. I don't have particular preference for driftwood but I bought entire quart of it so I will be using it for quite some time until is gone.

Thursday, September 15, 2011

Project Update: Sokol's Mattress & Furniture Co by Bar Mills

This is the project I have been commissioned to do. Therefore, it is a little higher pace one. I work on it pretty much every day for about an hour. So far it is most complicated Bar Mills kit I have ever done duo to mitered corners and large and because of that flimsy windows. So far I have painted and weathered walls and have started installing windows.

What's in the box: Frank's Fishing Shack by Nick & Nora Designs

Here is another one today. I should have named it "What's in the bag" since this kit comes in the bag rather the box. This kit and previously reviewed are in the same price range. I think difference is 50 cents.


I'll do beer review next time and it ain't gonna be Bud Lite for sure.

What's in the box: The Office by Railroadkits.com

Few years ago there used to be around ezine dedicated to scale paper modeling. It had first look column. Purpose of it was to give the reader an idea about the kit - its print quality, difficulty level and so forth. The column didn't include pictures because digital cameras weren't that widely used back then. There was also some pirating aspect as well. Someone could possibly take the pictures and print out the kit. Need for such column came about because only way to obtain paper models was and is through mail order or Internet.
While number of craftsman kits is available through local hobby stores or at the shows most of the time I find that the ones I want I can obtain only over Internet. It is  always like buying the cat in a sack. Sorry for the expression which could be hard to understand. Pretty much all countries in Europe have one like this except UK. I am guessing US doesn't as well. Google "the cat in a sack meaning" if you are not sure what I mean. Anyway, I intend to let that cat out of the sack and do "What's in the box" series every now and then whenever I get new kit or just decide to grab on I already have. Of course, reader contributions are accepted as well. Not that I have many but I hope that will change. I think I'll do it in more pictorial format than listing how many 2 by 4s are there. Some kits may require quite an investment of time which is quite scarce. Maybe one day I can get some expert on board who could do cost evaluation like they do in electronics industry where they take something like iPad apart and calculate the cost and the profit margin. I know it may sound like big blasphemy in many craftsman structure builders ears and as they say I should be grateful just for ability to buy the kits but I think some of them are way overpriced. Just like Apple products.

First up is The Office by Railroadkits.com. It is one of their Ed Fulasz line kits. I didn't take everything out of the box because some of the walls are glued to the bottom of it for safer shipping. The hydrocal parts are very crisp and fine. A bit too much for my taste but I can always chip brick there and there to get more weathered look.

Project Update: Finescale Miniatures JS-13 Elijah Roth & Sons

I have managed to do some work on Elijah kit as well over the past few weeks. I have painted the rockwork and installed it along with concrete and wood retaining walls.


Project Update: Fat Jimmy's BBQ

Progress of this project has been slow lately. I only managed to make and install roof vents. None of them are castings.


Wednesday, September 14, 2011

Project Update: Wicked Wanda's by Bar Mills


This is another project that is in the works currently. I finished Wanda's building almost two years ago and then set it aside until I get parts needed for diorama. I thought it was going to be one or two weeks before I get back. However, I got caught up in doing another kit, then one more and so forth. Later on I decided that I wanted a shed then few other things. Finally, about a month ago I got around making that shed and started diorama.

First I made a tree out of one of sagebrush twigs I collected in California in 2010. It turned out to be too tall for this diorama and I wasn't happy with overall shape of it.  


Therefore I made second one out of another sagebrush twig and super tree material. Only picture I have is of very early stage - bare trunk and roots. I thought of taking picture of the tree already "planted" but I messed up whole thing before I had a chance to take a picture. I'll tell all about it a bit later.


Then I glued Cellfoam 88 on 1" thick blue foam to get some elevation. Idea behind was that to have flat surface for structures and track and fill the rest of it  with Sculptamold.


Then I found my first batch of Lou Sassi's Goop I made two years ago and decided to use it since it was still good. I had just enough of it to fill spaces in between pieces of Cellfoam. I let it sit for a few days and discovered that it had shrunk creating hilltops and valleys. I thought of making another batch but then decided that zip texture would fill all valleys. Zip texture was something I wanted to try. The whole idea of building diorama is to learn new techniques anyway. So I mixed up plaster and tempera paint for the zip texture and proceeded. I wanted to have old abandoned track with ties partially covered with dirt and grass so I applied zip texture over the track as well. After everything dried I ended up with way too coarse surface and track looking like one big mess. Well, not exactly what I really had in mind. I have to redo everything using Sculptamold and old good dirt. I hope I can cut out and save the tree. Back to making the base and weathering track tonight.

Tuesday, September 13, 2011

Dubois Store by Branchline

I originally posted my experiences building Dubois Store kit by Branchline on kitforums.com. However, since threads tend drift into nonexistence with time over there I thought copying it here would give the information longer life and possibly reach broader audience.

Despite the fact that it is tab and slot kit it took me much more effort to build it than some FOS or Bar Mills kit. The interior details nearly drove me insane. It would have not been that bad hadn't they had sticky glue on the other side. I wasn't sure how it would take paint so I decided to remove the glue. Since parts are very fragile in the process I broke quite few of them and I had to glue them back together.
Few other things didn't go well too.
1. The base of the long roof was too long. I had to shorten it and cut off the wall tabs.
2. The roofing material of the long roof had opening for the dormer cut out at wrong angle and too big. Initially I glued "metal" sheeting under the roofing. However, the roofing is too thick and the angle made gaps at the top wider than at the bottom. It didn't look right so I filled it with automotive putty and scribed shingle lines.
3. I am not sure why the structure base has slots cut out for the entrance doors since they only have top tabs. That proved to be another problem. The slots turned out to be closer to the front than the doors leaving gaps in front of them. To fix it I made two "concrete" pads and covered the gaps.
4. The top of storefront windows aligns exactly with store ceiling leaving no room for error and for window "glass" thickness. I wasn't sure if my alignment was OK and I wouldn't end up with edge of the ceiling showing through the window so as precaution I put the curtains on.

It seems I have overcome all these hurdles and I am quite happy with end result.


Friday, September 2, 2011

Flashback: Four Fingered Tony's by Bar Mills

It is time for some history. This time it is a laser cut craftsman kit made by Bar Mills. It is called Four Fingered Tony's Meat Market. I built it about a year ago and truly enjoyed the experience.