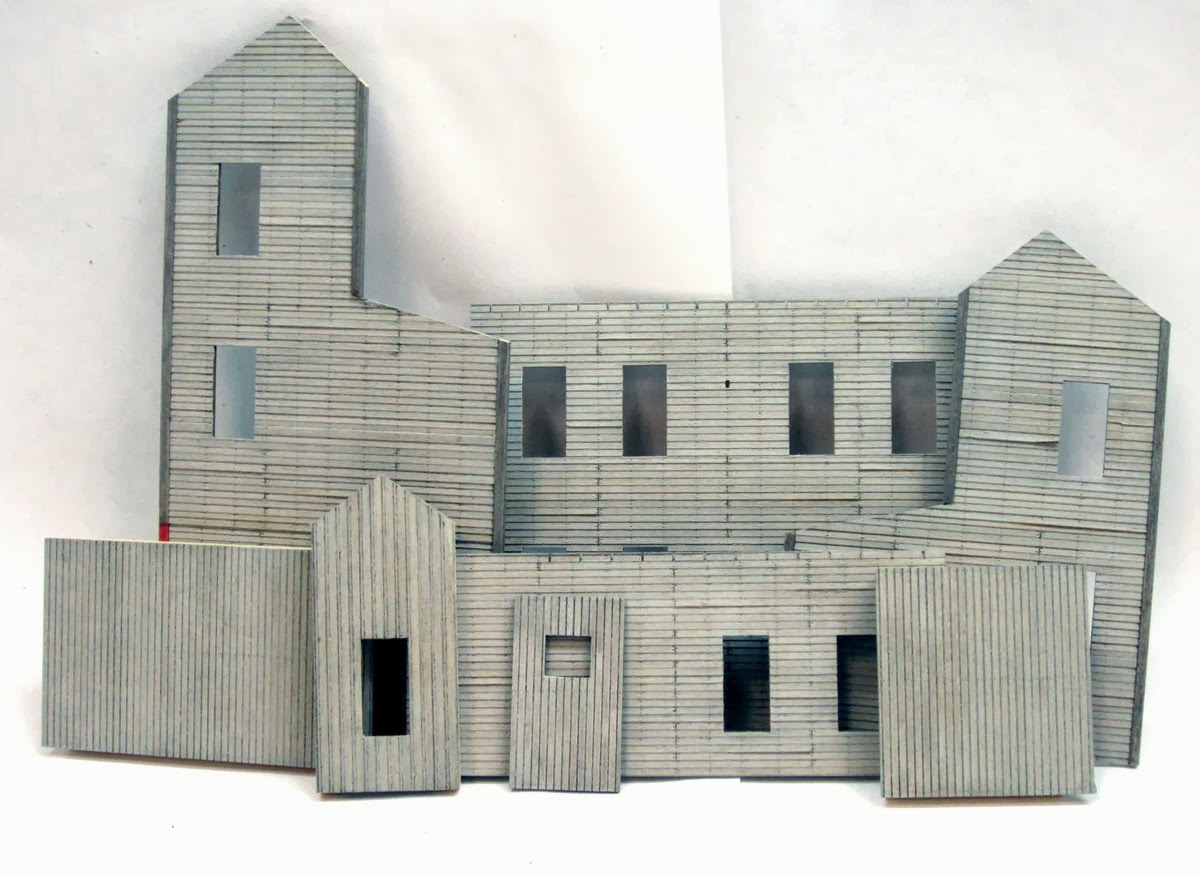
While I intend to build most of the kits I own into diorama there are few that I have no interest in investing too much time in. Possibly I could auction them off but I have paid too much and most likely I would not break even if I did so. Therefore, I am going to build and then auction them off in a hope that I will recover my investment. Someone may argue that I would invest even more if I built a kit but monetary value of my time isn't important if I am having fun.
I am starting with my first red headed stepchild. It is Flour Mill by Laser Art. I acquired it before I built my first kit of theirs, before I knew of challenges awaiting, before the list of kits I would like to build shrunk eliminating not only certain kits but eliminating certain manufacturers as well. One of them is Laser Art. I can't say anything bad about them. I just don't find them appealing any longer. There is a number of way more interesting kits. Therefore, it is my last kit by Laser Art unless someone asks me to build one or I need some building for my layout which I don't have and don't plan on building one in the nearest future.
Some of the kits are complete package. They are so well designed that it is hard to change or add anything without ruining them. Even painting in colors other than of pilot model is quite a challenge. Others just ask to be modified. I find this kit to be one of them. Perhaps because of its simplicity. I am not going to change shape of the structure but I will change some of the materials used, add more details, change purpose. Speaking of which it will become K.W.Murphy Engineering Works named after my boss who retired about a month ago. He has been my boss for past 15 years and this is my little tribute.
To start with I have cut off all tabs where corner post go. I hate those plywood strips that are supposed to cover tab joints. They are always too narrow. Plus they have unsightly laser burnt edge which needs to be painted what is always pain in the area of body we don't speak off. The tabs have been replaced with 5/64" basswood. So far none of other modifications have been done yet but they are coming.
Friday, October 11, 2013
Thursday, October 10, 2013
Project Update: Gritty McDuff's by Bar Mills
McDuff's is moving full steam ahead. Those few extra hours are paying dividends. Almost all castings have been cleaned up. Remaining need some 10-15 minutes of Dremel time. All but one building walls have been painted and nail holes put in.
The main building is almost ready to be glued together. All it needs are shades and curtains. I think I have found more efficient way to glue window "glass" in. I use Future acrylic gloss medium. It not only acts as gluing agent but makes acetate reflect light like real glass. I used to throw pieces of acetate into rubbing alcohol to wash finger prints and whatever is on them. Then I would dry them off with lens cleaning tissue. Although the tissue is supposed to be lint free but after cleaning few pieces of acetate it starts shedding. Dust particles get attracted by static and they stay on "glass" even after dunking them in Future creating unsightly spots after it dries. I think I have got a solution. Instead of drying off alcohol I touch edge of acetate to paper towel to drain excess and then I dunk acetate in Future. No static, no dust specks. Plus it eliminates one step and therefore it is faster.
Wednesday, October 9, 2013
Project Update: Texaco Gas Station by Micro-scale Models
Not so much progress here. I have been painting castings and I am still wrestling some of them. After painting canopy posts from detail set I have learned that they are too short. That has brought my motivation level way down. As a result I basically force myself to do one or two little tasks each day just to get moving while devoting majority of my time to Gritty's. I have figured how to extend posts preserving their visual quality though. I bought some styrene rod for that purpose. However, I had figured the diameter I needed but at a store it looked like it was too small so I changed my mind and bought one step larger. That was a mistake. Now I need to go back and exchange for the correct one. I really hope all this is worth the effort.
Monday, September 30, 2013
Project Update: Gritty McDuff's by Bar Mills
Here is this secret project I mentioned in my previous post. Until about the end of November I have 3-4 hours per week that I can spend more usefully than being plain bored. I tried reading but it felt like I was forcing myself. Then I figured out that I could do some simple things that don't require complex setup, something I can do in the field conditions. I didn't get McDuff's before first availability after I came up with the idea so I tested it on couple of my own kits. One of them is way past initial clean up stage. Another I have put back in the box and it is now waiting for its time. I'll post about these projects later.
I have been working on McDuff's this way for about 3 weeks now. I have done cleanup of all wood parts, all plastic windows, and about half of castings. I have stolen some time from Houligan's Alley and Texaco Gas Station so I could continue working on McDuff's instead of grabbing next kit of the shelf. Actually, I stole a little more from the gas station than actually was needed. I just couldn't help myself. Anyway, I have enough work for about 2 more weeks. After that I will have to figure what else I can do on McDuff's. If not I'll have to come up with something else. I have about another 8 kits lined up for me to build. Ideally it would be nice to do initial preparation of 1-2 kits from that collection to speed up the process but I hate to ask since I already have two kits that I am working on right now. Or... I have been wanting for some time to try my hand at making wire armature trees. I have both "Making Trees" books, wire. All I need is few photos of real trees to model after. The process involves steps that are hard to do in the field setting but wire twisting surely can be done. Or... Perhaps I should look around my modeling room for something that would allow me to refresh some stale projects...
Friday, September 27, 2013
Project Update: Texaco Gas Station by Micro-scale Models
I fell asleep yesterday trying to come up with starting line for my post. It is attempt number two. I hope it won't suffer same fate.
I don't have much to mention. It is pretty much same routine. Clean up the castings, prime, paint, some work on the structure itself but nothing new or exciting besides perhaps Campbel shingles. I used them for the first time. On my Houligan's Alley project I used real cedar instead. I should have read George Sellios' instructions anyway though. Campbel shingles come with some glue that it is activated by applying water. It isn't very strong so George recommends using white glue instead. No wonder I had to re-apply water quite often and press shingles back in place. And then after I brushed shingles with A&I they popped up in some places. I thought I was going to have to use white glue but pressing them down was enough.
Further construction depends on few castings so it may be a week before I get back to work on the structure itself. Meanwhile I will be painting castings and maybe working on a secret project if time permits.
I don't have much to mention. It is pretty much same routine. Clean up the castings, prime, paint, some work on the structure itself but nothing new or exciting besides perhaps Campbel shingles. I used them for the first time. On my Houligan's Alley project I used real cedar instead. I should have read George Sellios' instructions anyway though. Campbel shingles come with some glue that it is activated by applying water. It isn't very strong so George recommends using white glue instead. No wonder I had to re-apply water quite often and press shingles back in place. And then after I brushed shingles with A&I they popped up in some places. I thought I was going to have to use white glue but pressing them down was enough.
Further construction depends on few castings so it may be a week before I get back to work on the structure itself. Meanwhile I will be painting castings and maybe working on a secret project if time permits.
Thursday, September 12, 2013
Project Update: Texaco Gas Station by Micro-scale Models
I received the Texaco Gas Station to build in the late spring. I had quick start but then other projects and real life pushed it to the side. I am getting back and intend to work on it until it is finished.
This is yet another kit that contains L shaped dimensional lumber for corner posts. My first reaction was to adjust wall sections for square 5/64 stripwood. Then after fit test I've decided to use L shaped stripwood that came with the kit. It looks like Texaco Gas Station has been produced after McGee's and some improvements have been made one of which is proper dimensions of corner post material.
Not everything has been smooth so far though. The kit comes with a sheet of dry transfers. At first I thought it was going to be a piece of cake to apply them. However, backing is quite thick and making it to "hug" clapboards is nearly impossible. My several attempts resulted in torn up, peeling dry transfer film. In addition, I believe such structure would have had one or two painted signs and the rest would have been hang on type. Therefore, I gave up on dry transfer after installing just few, recreated one of "painted" signs that I destroyed in the process but still wanted and glued it on using my standard technique. The rest of the signs will have some thickness to them so they look like they are made of tin. I intend as well to cover up some of the signs I have already made using dry transfers since I don't like the way they have turned out.
I have a little bit more work cut out for me than just building the kit. Along with the kit I also received white metal casting set for service stations by Scale Structures. The set includes a number of details and some of them are quite unique. So far I have opened and cleaned up only one of the packages. The parts are nice but have quite a bit flashing which takes time to remove. That makes me appreciate quality of FSM white castings for sure. Cleaning them up isn't what I like doing.
This is yet another kit that contains L shaped dimensional lumber for corner posts. My first reaction was to adjust wall sections for square 5/64 stripwood. Then after fit test I've decided to use L shaped stripwood that came with the kit. It looks like Texaco Gas Station has been produced after McGee's and some improvements have been made one of which is proper dimensions of corner post material.
Not everything has been smooth so far though. The kit comes with a sheet of dry transfers. At first I thought it was going to be a piece of cake to apply them. However, backing is quite thick and making it to "hug" clapboards is nearly impossible. My several attempts resulted in torn up, peeling dry transfer film. In addition, I believe such structure would have had one or two painted signs and the rest would have been hang on type. Therefore, I gave up on dry transfer after installing just few, recreated one of "painted" signs that I destroyed in the process but still wanted and glued it on using my standard technique. The rest of the signs will have some thickness to them so they look like they are made of tin. I intend as well to cover up some of the signs I have already made using dry transfers since I don't like the way they have turned out.
I have a little bit more work cut out for me than just building the kit. Along with the kit I also received white metal casting set for service stations by Scale Structures. The set includes a number of details and some of them are quite unique. So far I have opened and cleaned up only one of the packages. The parts are nice but have quite a bit flashing which takes time to remove. That makes me appreciate quality of FSM white castings for sure. Cleaning them up isn't what I like doing.
Friday, August 30, 2013
Making copper flashing
Doug Foscale from FOS Scale Models has just posted following tip. It is really good one. Check it out here:
Making copper flashing
Subscribe to:
Posts (Atom)